

Style
DIY Blowout for Fine Hair: 7 Pro Secrets for Maximum Lift
Feb
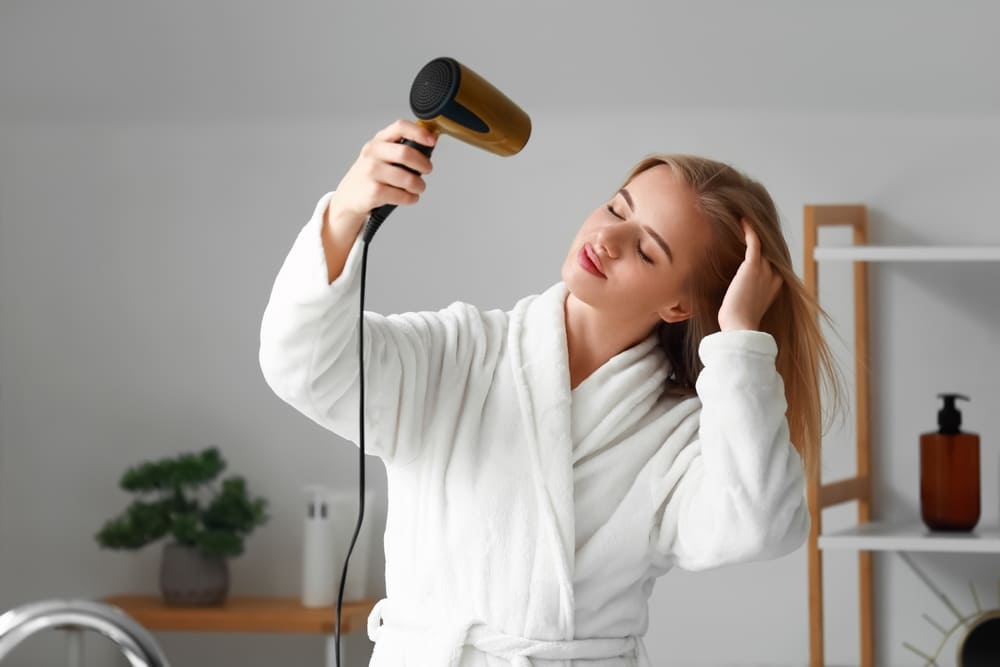
Fine hair and blowouts have a complicated relationship. The promise of a full, bouncy style that lasts all day can feel just out of reach when your strands fall flat before you even finish drying. But here’s the truth: achieving a great DIY blowout for fine hair is less about luck and more about technique. The right approach, the right tools, and a few insider tricks can completely change what you get out of your morning hair routine.
Read on as Nubi breaks down seven pro secrets that stylists use to create crown volume, root lift, and that enviable big hair aesthetic, all from the comfort of your own bathroom. Whether you are a blowout beginner or someone who has been struggling with the same flat results for years, these tips will help you level up.
Why Fine Hair Needs a Different DIY Blowout Strategy
Fine hair has a smaller diameter per strand than medium or thick hair, which means it lies closer to the scalp, picks up oil faster, and loses its shape more quickly under heat. It is also more prone to static, frizz, and heat damage if you are not careful.
The good news is that fine hair actually responds really well to blowouts when you understand its quirks. Because the strands are lightweight, they can hold volume beautifully if the technique encourages lift at the root rather than weight at the ends. The secrets below are built around exactly that principle.
Secret 1: Start With the Right Wash
A salon-quality blowout at home begins before you ever pick up a dryer. Fine hair benefits from a lightweight, volumizing shampoo and a conditioner applied only from mid-shaft to ends, never at the roots. Weighing down the root area with conditioner is one of the most common reasons fine hair goes flat before the blowout even starts.
After washing your hair, resist the urge to rub your locks with a towel. Instead, gently squeeze out excess water and let a microfiber towel or a soft t-shirt absorb moisture while you prepare your products. Over-roughing the cuticle at this stage creates frizz that is hard to correct later in your morning hair routine.
Secret 2: Use a Volumizing Primer, Not Just Any Product
Product selection for a DIY blowout for fine hair is where most people go wrong. Heavy creams and serums weigh fine hair down and create buildup that reads as grease by midday. Instead, reach for a lightweight mousse or volumizing spray applied at the roots while hair is still damp.
Work the product through your roots with your fingers, lifting sections away from the scalp as you go. This distributes the formula where it will do the most work: at the base of each strand, where root lift actually begins.
Secret 3: Section Strategically for Crown Volume
One of the biggest differences between a professional blowout and a DIY attempt is how the hair is sectioned. Stylists do not dry hair all at once. They separate it into deliberate sections to ensure each part gets full attention and proper directional tension.
For fine hair and crown volume specifically, start at the nape of the neck and work upward. Clip the top and sides out of the way and dry the back sections first, directing airflow upward toward the crown. When you get to the top sections, clip them away from the scalp at a 90-degree angle or higher before drying. This elevated angle is the mechanical foundation of a lifted, voluminous blowout.
Take smaller sections than you think you need. With fine hair, smaller sections dry faster and hold their shape more reliably. Trying to dry too much hair at once leads to uneven results and missed volume.
Secret 4: Choose a Dryer That Works as Hard as You Do
The dryer you use matters more than most people realize. A weak or inconsistent motor means you are holding heat on each section longer than necessary, which is not ideal for fine strands. A precise, high-powered dryer lets you move efficiently through sections while keeping heat exposure controlled.
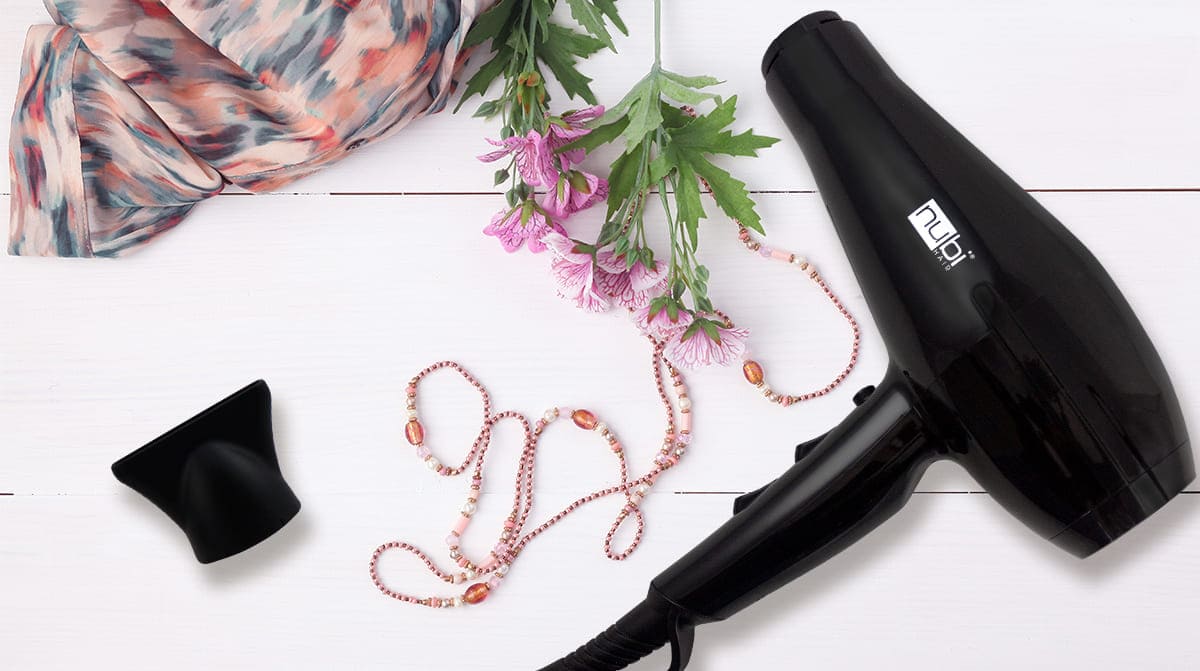
The Blow Me Away from Nubi is built for exactly this kind of precise, section-by-section styling. It features a 1600-2100-watt AC motor, a high-performance fan, and three temperature settings so you can match the heat level to your hair type. For fine hair, starting on a medium setting and adjusting as needed is a smart approach. This dryer also comes with two concentrators, the narrow nozzle attachments that focus airflow into a precise stream. That focused airflow is what allows you to direct lift exactly where you want it, rather than blasting hair in every direction.
This high-quality blow dryer may initially seem like a considered investment, but when you compare it to the ongoing cost of salon blowouts, it pays for itself quickly. The 5.5-foot power cord gives you plenty of reach, and the removable end cap makes cleaning out lint a breeze, which keeps the motor running at full performance over time.
Secret 5: Master the Direction of Airflow for Root Lift
Here is a detail that makes an enormous difference and rarely gets explained clearly: the direction of the airflow relative to your hair determines whether you get lift or flatness.
When blow drying for root lift, angle the concentrator so that the airflow travels upward through the hair section, from the scalp outward. Never let the air blow straight down onto the top of the strand. That direction seals the hair flat against the scalp and works against the volume you are trying to create.
Use a round brush to lift the section upward and slightly away from the scalp while you direct the dryer underneath it. Think of the brush as creating the shape and the dryer as setting it in place. Keep moving the hair dryer back and forth along the length of the section rather than holding it in one spot, which helps distribute heat evenly and prevents overheating fine strands.
Secret 6: Use the Cool Shot Button to Lock Everything in
This is the step that separates people who wonder why their blowout falls flat by noon from people who still have volume at the end of the day. The cool shot button is one of the most underused features on any hair dryer, and for fine hair it is essential.
Heat opens the hair cuticle and makes strands pliable enough to take a new shape. But that shape will not hold until the cuticle closes back down, which happens when the hair cools. If you release a section from the brush while it is still warm and move on, the hair reverts before it has set.
The fix is simple. Once you finish a section, blast it with the cool shot button on your dryer, holding the shape in place with the brush for about five to ten seconds until the hair feels cool to the touch. That section is now locked in with maximum volume until your next wash. The Blow Me Away includes a cool shot button for exactly this purpose, making it a genuinely practical tool in your morning hair routine rather than a feature you never use.
Work through every section this way, with a cool shot at the end of each one, and notice how much longer your blowout holds.
Secret 7: Finish With a Hot Brush for a Frizz-Free, Polished Look

Once your hair is fully dry and shaped, the blowout is technically done, but this finishing step is what takes it from good to great. Fine hair tends to have a few sections that dry with more frizz or flyaways than others, especially around the face and at the crown. A quick pass with a heated styling brush on dry hair smooths those sections instantly without disturbing the volume underneath.
This is where Nubi’s Simply Sleek Brush Teal earns its place in the routine. Used on fully dry hair as a finishing tool, it delivers Infrared Heat and Negative Ion Technology through a ceramic surface with structured bristles, sealing the cuticle and adding a glossy shine as you brush through. The five adjustable temperature settings, ranging from 285 to 430 degrees Fahrenheit, give you control over how much heat you apply, which is especially important for fine strands. A lower temperature setting is usually all you need to smooth out the surface without flattening the volume you worked to build.
The ergonomic handle and 360-degree swivel cord make it easy to maneuver around the crown and hairline without awkward contorting. A few passes through the top sections and along the lengths leaves hair looking smooth, shiny, and healthy, giving you that polished, just-left-the-salon result without any additional product. This is one-step styling for the finishing phase: instead of reaching for a serum and hoping for the best, you simply brush through with a tool that does the smoothing work for you.
Putting it All Together: Your Go-To Morning Hair Routine
When all seven secrets come together, a DIY blowout for fine hair stops feeling like a gamble and starts feeling repeatable. Here is a simple sequence to anchor it in your morning hair routine:
- Wash and condition correctly, keeping product away from the roots.
- Apply a volumizing primer to damp roots.
- Section your hair, starting at the nape and working upward.
- Use the concentrator attachment on the Blow Me Away to direct airflow underneath each lifted section, using a round brush to hold the shape. Hit the cool shot button at the end of every section.
- Once hair is fully dry, flip and shake to break up the roots, then do a finishing pass with the Simply Sleek Brush Teal to smooth frizz and add shine.
The whole process takes practice, but after a few sessions, the muscle memory kicks in and the time drops significantly. Most people find that a full blowout for fine hair takes between fifteen and twenty-five minutes once they have the technique down, with the finishing step adding only a few minutes on top.
Mastering a DIY Blowout for Fine Hair
One of the best things about the big hair aesthetic right now is that it is genuinely achievable for fine-haired people. The tools exist, the techniques are learnable, and the results, when you get them right, are honestly stunning. Volume that lasts, shine that reads as intentional, and a style that feels like a true salon-quality at-home experience.
The key is treating fine hair as something that requires specific knowledge rather than extra product or extra heat. Lighter product, smarter sections, directional airflow, the cool shot button, and the right tools make a real difference. Start there, and you’ll likely be surprised at what your hair can actually do.
Ready to elevate your blowout routine? Shop Nubi’s hair products here.